Connect Dynamics 365 in Console Application using Application Registration and Application User
Dynamics
Steps in Microsoft Azure
Navigate to portal.azure.com and login.
Navigate to Azure Active Directory > App Registrations > New Registration
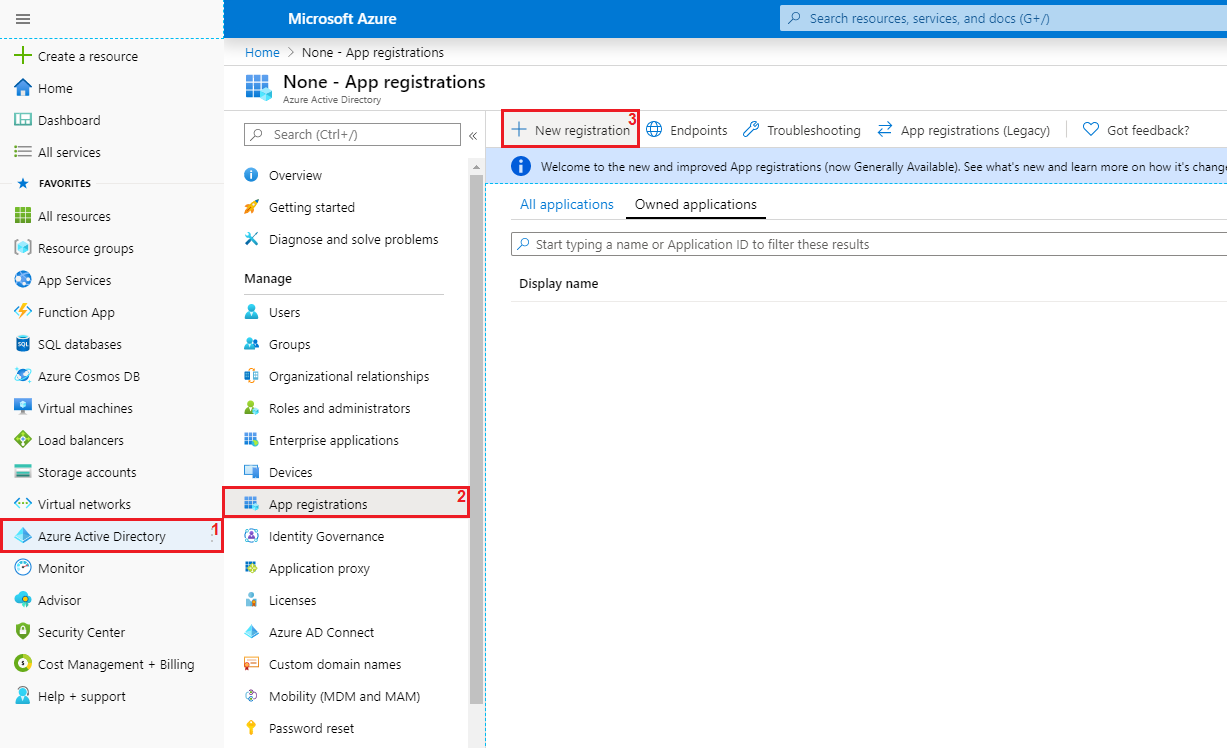
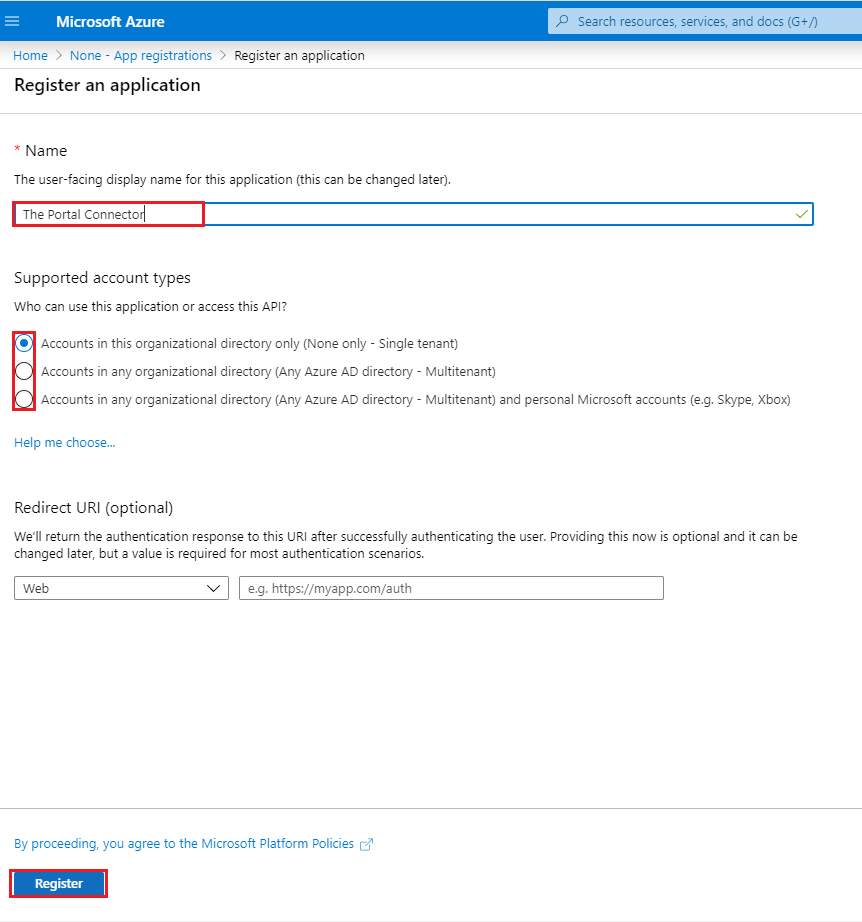
Register your Application.
Enter an Application name.
Select which account types you wish to access this API.
Click Register.
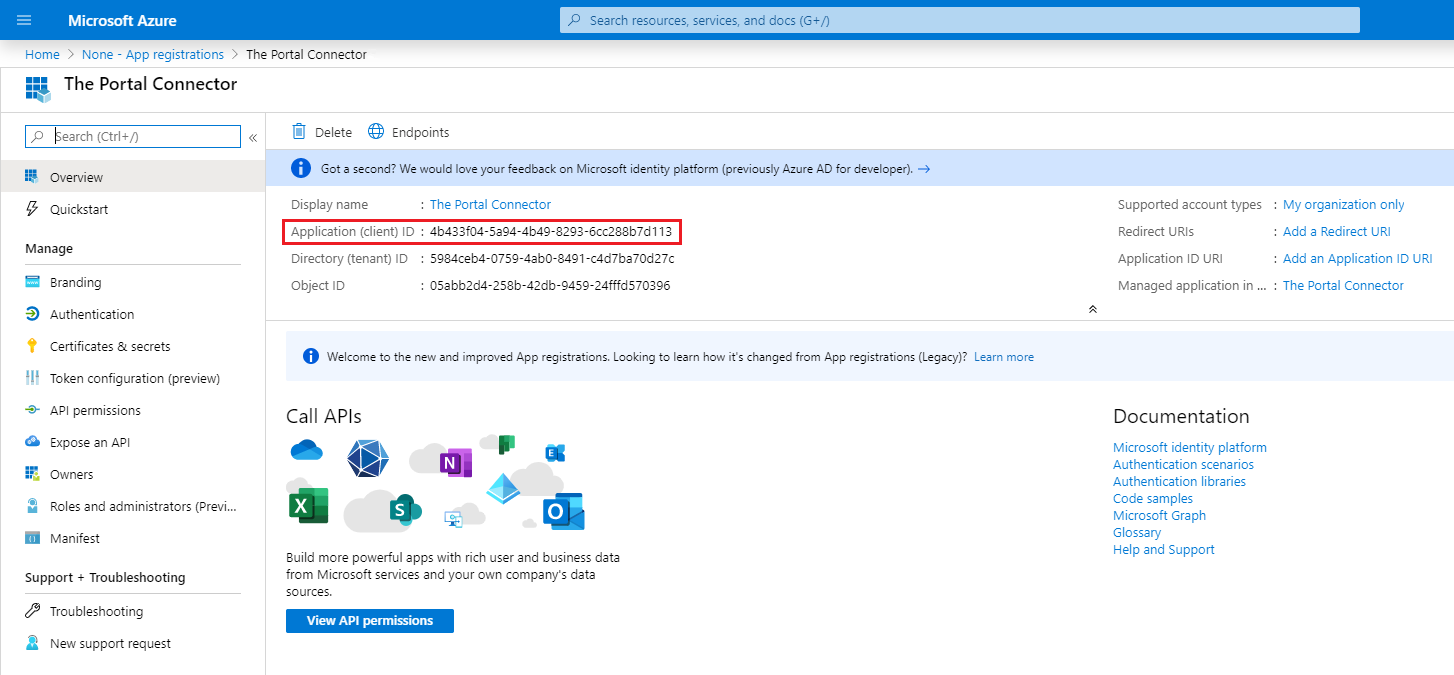
Copy the Application (client) ID and note it for later use.
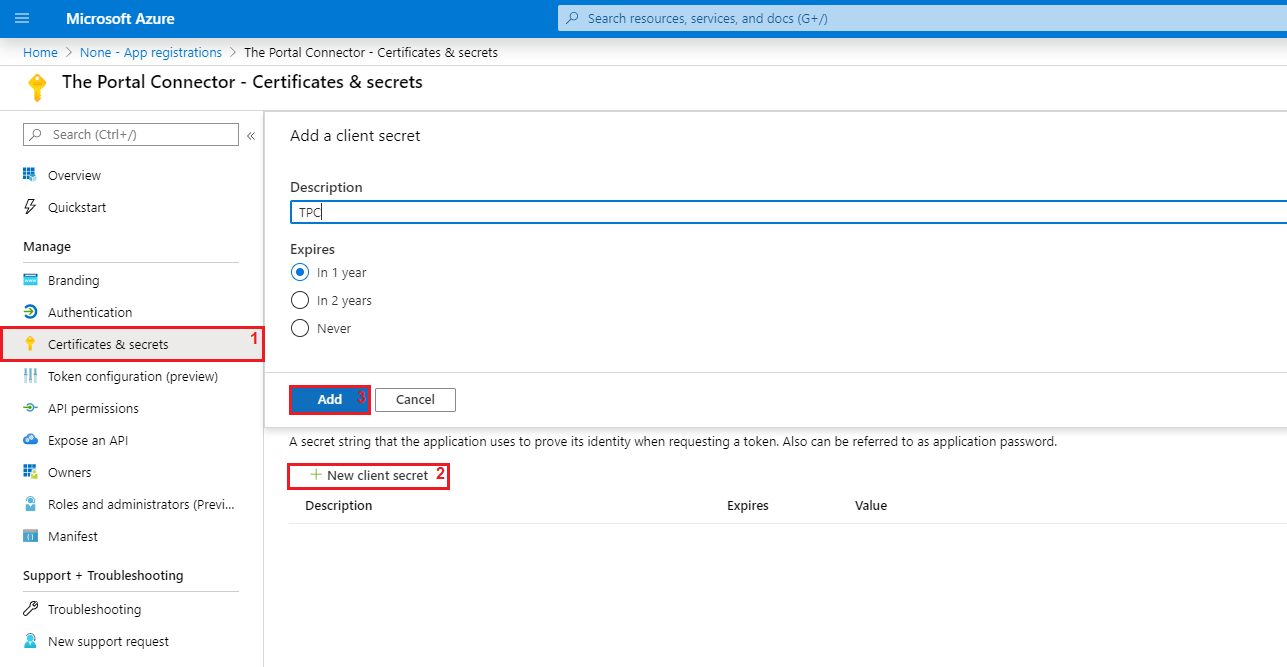
Create a new Client Secret for the Application.
Select Certificates & secrets > New Client Secret
Enter a description, select an expiry duration and click Add.
Copy the client secret and note it for later use. Make sure to copy the Value field, as below.

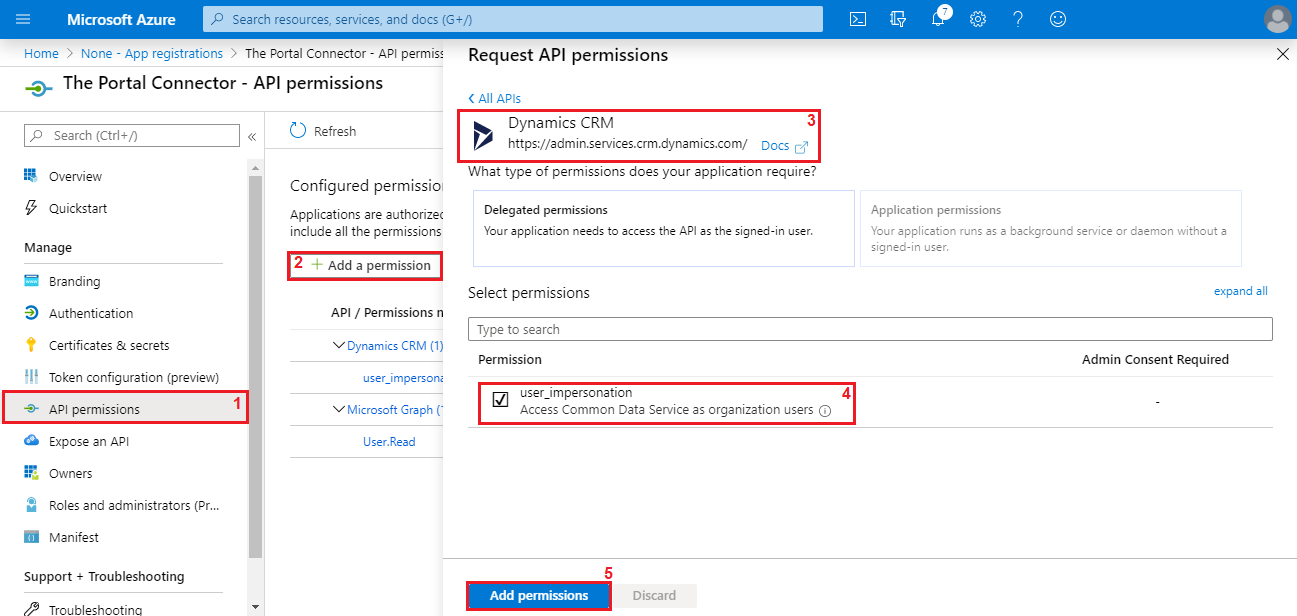
Grant Microsoft Dynamics permissions.
Select API Permissions > Add a Permission > Dynamics CRM
Select the checkbox for user_impersonation.
Click Add permissions.
Steps in Power Platform admin center
Login to https://admin.powerplatform.microsoft.com/environments and select your environment.
Under Settings, select Users + permissions > Application users.
In the Applications users page, select + New app user. A side menu slider will appear. Here you will:
Add the App you just created from Microsoft Entra
- Select the Business unit which points to your CRM
Edit the Security roles and add System Administrator and System Customizer roles before finally clicking Create.
Steps in Sitefinity
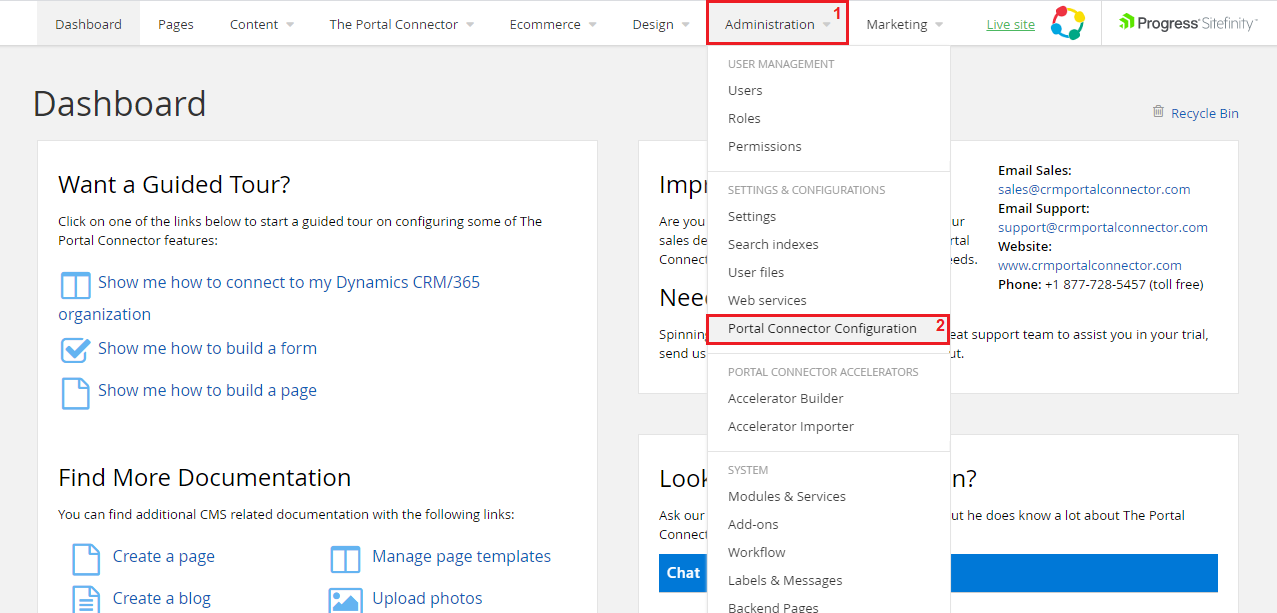
Navigate to the backend of your portal site
Go to Administration > Portal Connector Configuration
Fill in the Dynamics CRM connection settings
Under Connection Type select Client Secret
Under Server URL, Enter the URL to your dynamics server using the appropriate format, examples of which are displayed below the field.
Under Application (client) ID, paste the Application (Client) ID noted previously in the Azure Active Directory section.
Under Client Secret, paste the Client Secret copied and noted previously in the Azure Active Directory section.
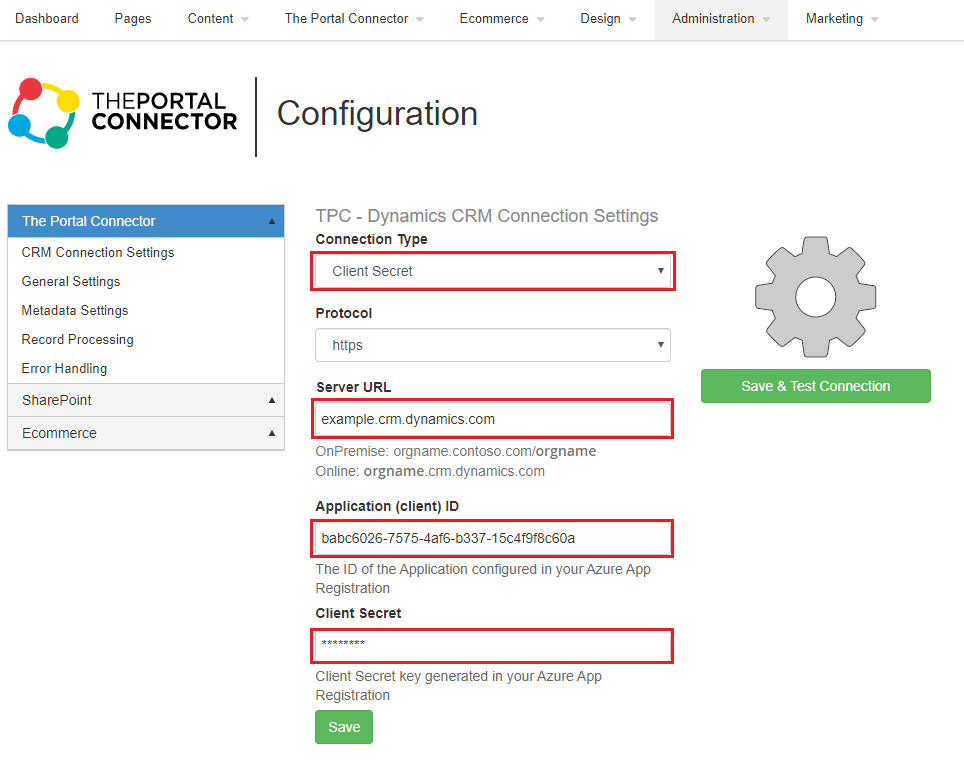
Click Save & Test Connection.
Code


Comments
Post a Comment